


AquaTru Under Sink - Pre-Carbon filter (1-2)
AquaTru Under Sink - Pre-Carbon filter (1-2)
Choose your version: i
What is the difference between Regular and Alkaline?
The AquaTru Alkaline Set combines our advanced 4-stage filtration process, which removes up to 99% of heavy metals, pharmaceutical residues, microplastics, and other contaminants, with an Alkaline VOC carbon filter that restores healthy minerals and increases pH. The result is clean, mineral-rich water that tastes as good as it is for you.


Choose your filters: i
Why do I want an extra filter package?
Our advanced filters have different lifespans. When purchasing a filter package, you are guaranteed to add 1 or 2 years of extra filter capacity to your AquaTru Classic.
Couldn't load pickup availability
In stock
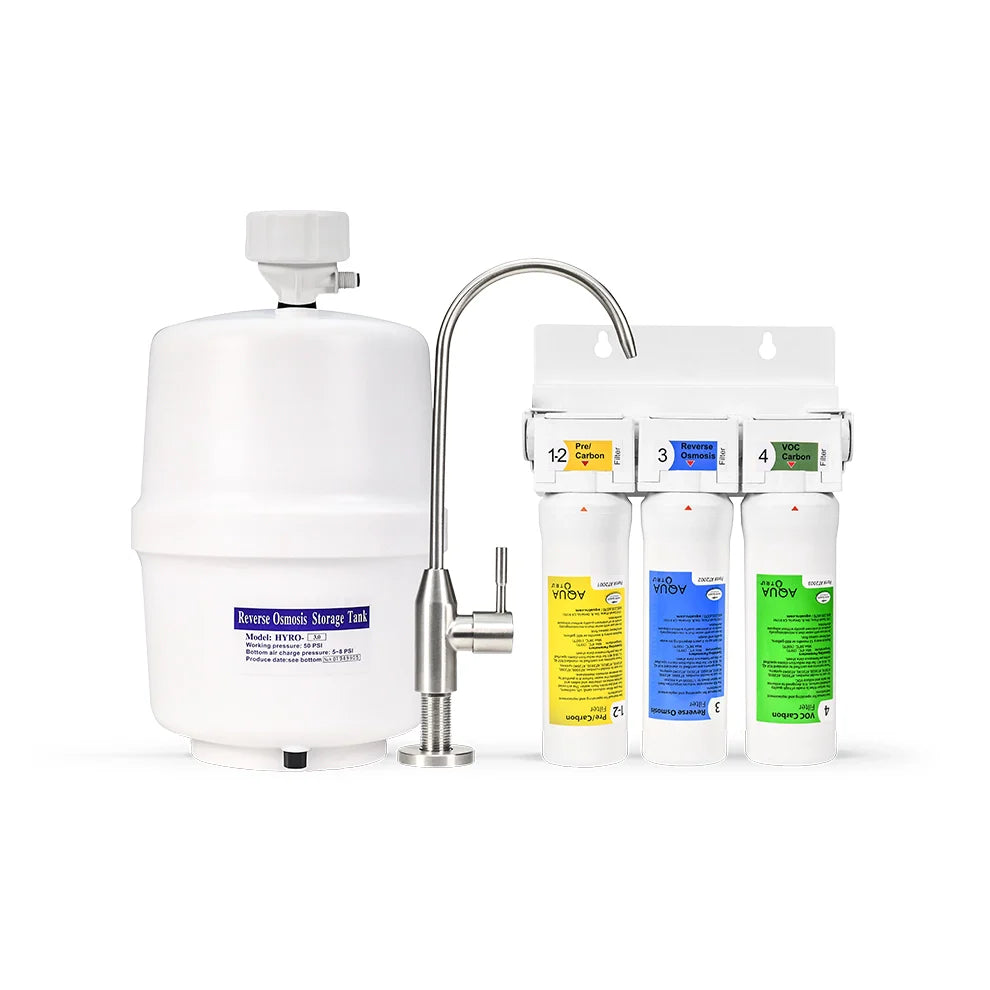
The pre-carbon filter (1-2) removes bacteria, sediment and other large particles from the drinking water and is suitable for the AquaTru Under Sink system. The activated carbon also removes any chlorine taste from the water. Because the filter filters large particles, it should be replaced once every 6 months. This prevents your device from getting clogged.
Time for replacement?
The AquaTru Under Sink system (1-2) Pre-Carbon Filter needs to be replaced every 6 months.
Helpful Hint: Write the date of filter installation with a permanent marker on the filter body, or use our helpful Filter Replacement Records chart, so you can easily identify when to replace the filter.

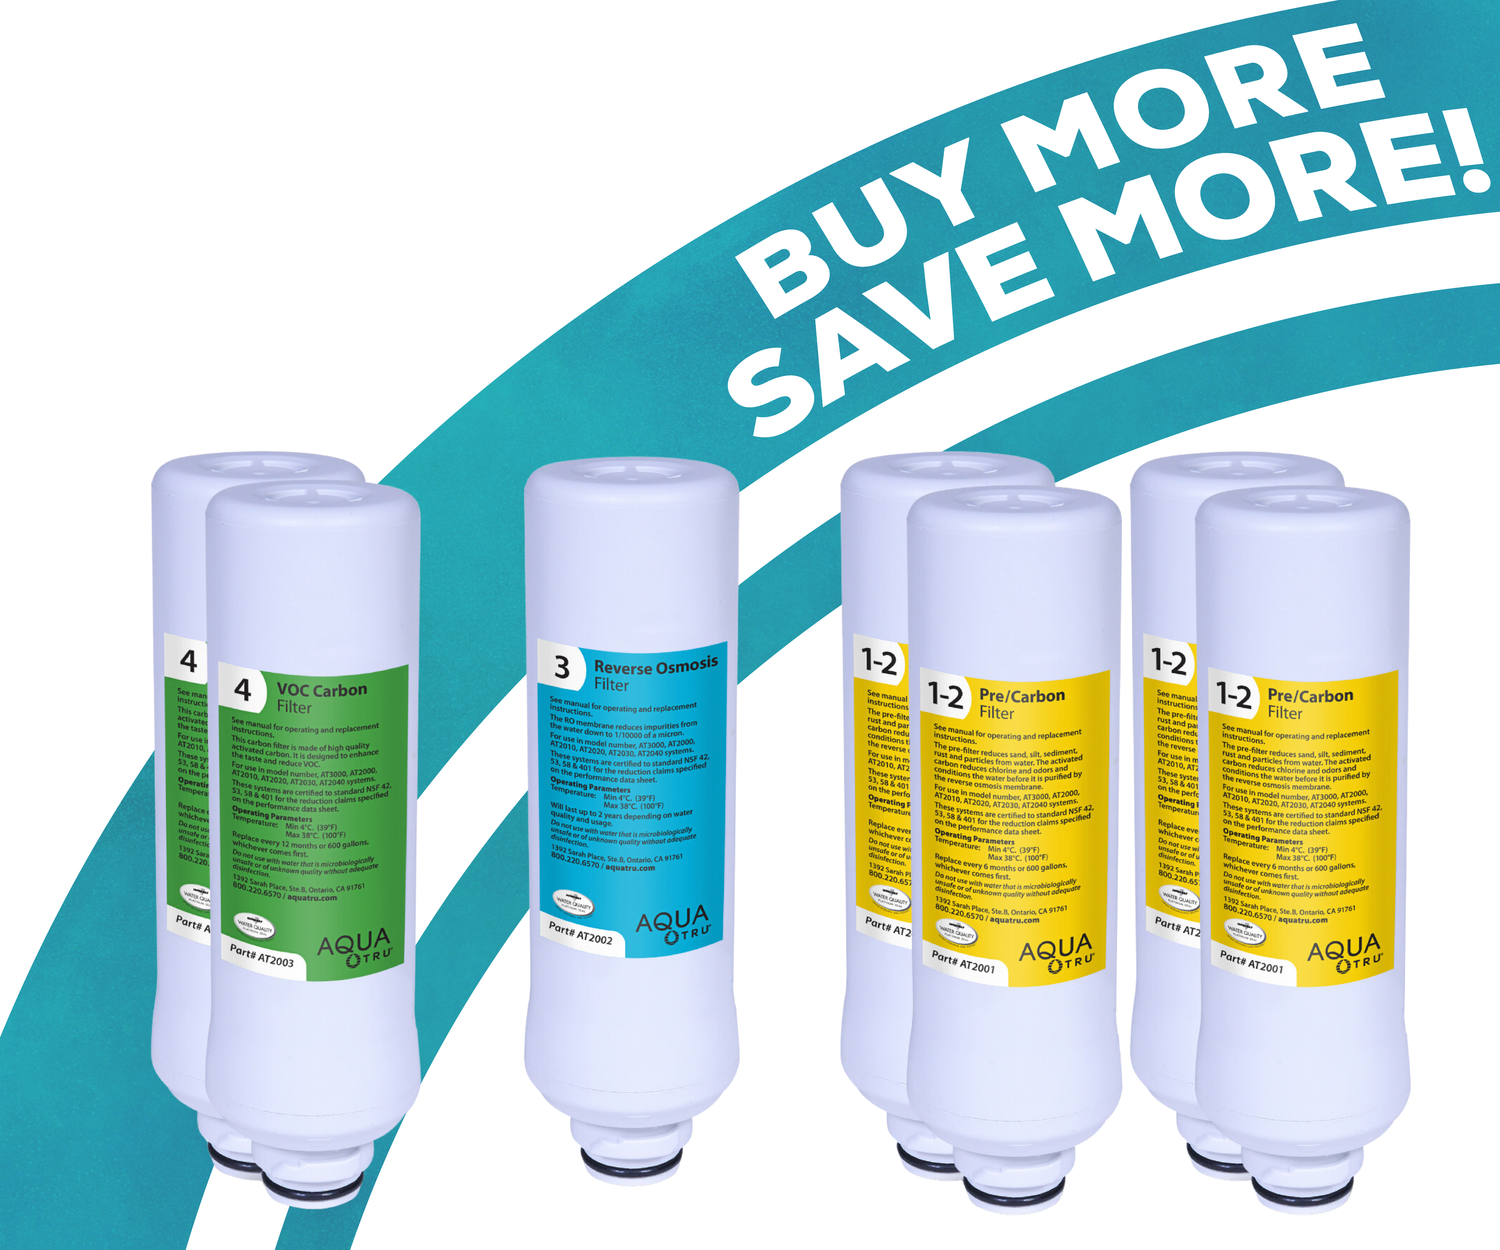
Want more savings?
Save up to €50 when you buy a 1-year or 2-year filter package for your AquaTru system. These packages provide everything you need for consistent, pure water all year round. By purchasing a bundle, you not only save money but also ensure you always have the right filters on hand when your device signals it’s time for a replacement. Investing in a package guarantees optimal performance and water quality for the long term. Check out our packages listed below and choose the best option for your needs!
When should you replace your filters?
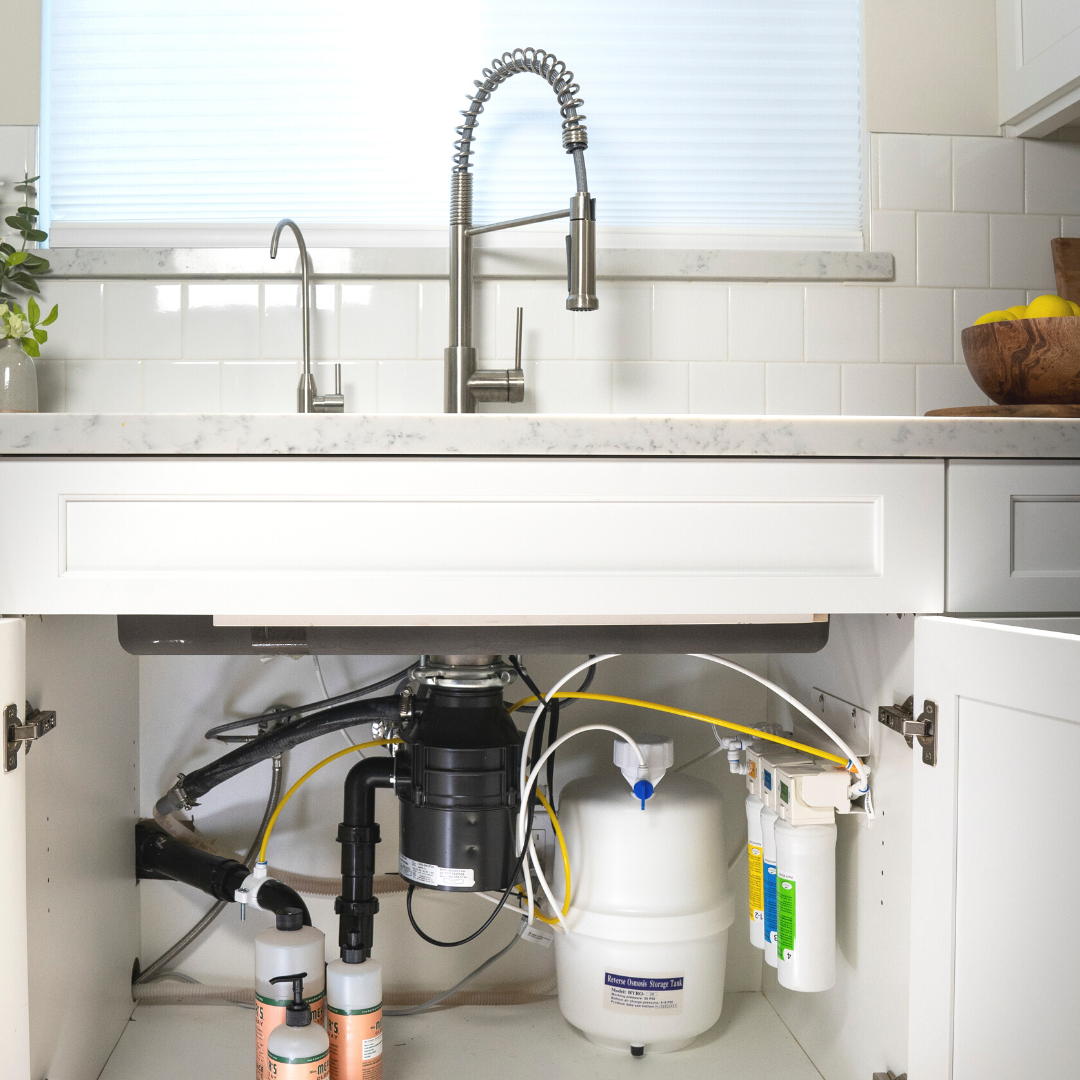
To keep your AquaTru Under Sink system performing at its best, filters should be replaced according to the recommended schedule or when you notice changes in water flow or taste. Unlike countertop systems, your Under Sink unit does not use indicator lights so staying on top of regular filter changes is key to maintaining optimal performance. Delaying filter replacement can reduce filtration efficiency, allowing contaminants to build up over time and affect water quality. Regular maintenance helps ensure clean, great-tasting water and extends the lifespan of your system.

Need help replacing your filters?
Simple steps to keep your AquaTru system performing at its best.
1. Shut off the cold water supply line connected to your system.
2. Open the RO faucet to drain any remaining water.
3. Twist and remove the filter.
Tip: The filter can pivot out for easier access
4. Insert and secure the new filter until fully in place.
5. Write the installation date on the filter to track replacements easily.
Tip: Use our helpful Filter Replacement Records chart.
6. Close the faucet and turn the cold water supply back on.
Bundle packages for the Aquatru Classic:
-
AquaTru Classic - Alkaline 2 year Filter Pack
Regular price €300Regular priceUnit price per€350Sale price €300Sale -
AquaTru Classic - 2 year Filter Pack
Regular price €260Regular priceUnit price per€310Sale price €260Sale -
AquaTru Classic - Alkaline 1 year Filter Pack
Regular price €120Regular priceUnit price per€140Sale price €120Sale -
AquaTru Classic - 1 year Filter Pack
Regular price €100Regular priceUnit price per€120Sale price €100Sale


